• About Heli

HeliFromFinland

~ Heli's thoughts on Machine Learning, AI, AI Agents, Database Designing, Oracle SQL Developer Data Modeler, User Groups and much more

HeliFromFinland

Monthly Archives: July 2016

Design Properties, Format

14 Thursday Jul 2016

Posted by Helifromfinland in Data Modeler

≈ Leave a comment

I do not like my entities to be light blue, what can I do?
Change the format for entities!

Go to Design Properties (either double-click the Design name in Browser or right-click and select Properties). Go to Format:

Format1

Double-click the Entity row (or press the XYZ icon) and select background color and border color preferred for entities.

Format2

If you select the Font tab you can define the fonts for elements related to entities, such as attributes, datatypes or primary key elements.

Format3

If you select the Default Line Widths and Colors tab you can define the line colors and widths to elements displayed as lines in Data Modeler diagrams.

Format4

You can define these Format properties to several element in Data Modeler, not just entities.

Format5


Classification Types

13 Wednesday Jul 2016

Posted by Helifromfinland in Data Modeler

≈ 3 Comments

A Classification Type is used to devide entities or tables in groups. Using them makes it easier to see different kinds of elements in a diagram or to use Transformation Scripts to only touch certain kinds of elements, for example.

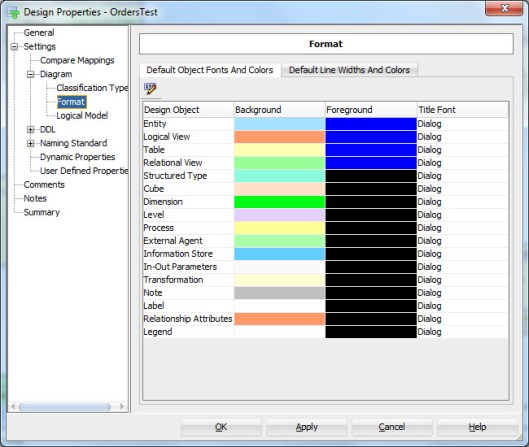
There are some pre-defined Classfication Types in Data Modeler but you are able to define your own types if wanted. You can find the Classification Types in Design Properties (double-click the design name in Browser or right-click and select Properties).

Class1

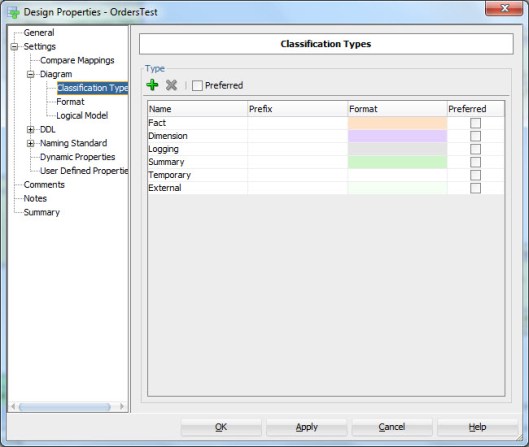
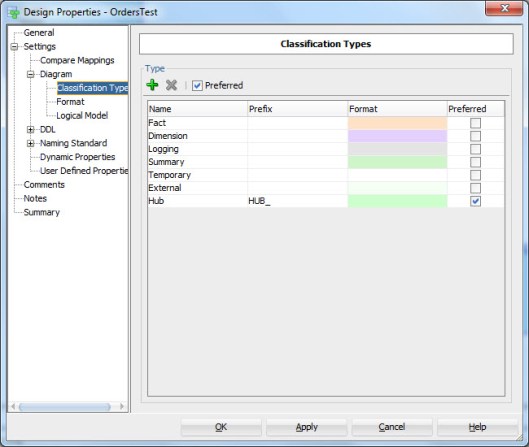
You can add new Classification Types by pressing the green plus. Insert the name, maybe the Prefix and select the Format (background color, border color, font). You can also define this Classification Type to be a preferred type. If you have plenty of Classification Types you might want to define the ones you use as preferred and use only those while defining the Classification Type for an entity. By enabling the Preferred check-box beside the green plus and red cross you set Preferred as the default when defining a Classification Type for an entity or a table.

Let’s define a Classification Type for hubs and define it as preferred:

Class2

To define a Classification Type for an entity go to Entity Properties and select the Classification Types tab:

Class3

If you defined Preferred as default in the Design Properties, it will be enabled automatically and only preferred Classification Types will be shown.

Class5

You can also enable Preferred in this screen if you want to.

Now select the Classification Type wanted from the list.

Note, if you want you can also define additional Classification Types for an entity but the properties defined for the base Classification Type will be used in a diagram.

Class6

The entity will be shown in the diagram using the definitions specified for a base Classification Type. If you change the font or colors for the Classifiacation Type afterwards, they will be changed for the entity/table of that type automatically.

Note that the Classification Type will be a property for a table as well and will be engineered to the table as it was defined for the entity when you use the Engineer to Relational Model functionality to generate the tables.

If you defined a prefix for a Classification Type you can use it as a prefix for a tableof that type. First select the relational model from Browser, right-click and select Change Object Names Prefix:

Prefix1

Then select Add Classification prefix.

Prefix2

Now the prefix defined in the Classification Type definition has been added to the table names that are defined as of that Classification Type.

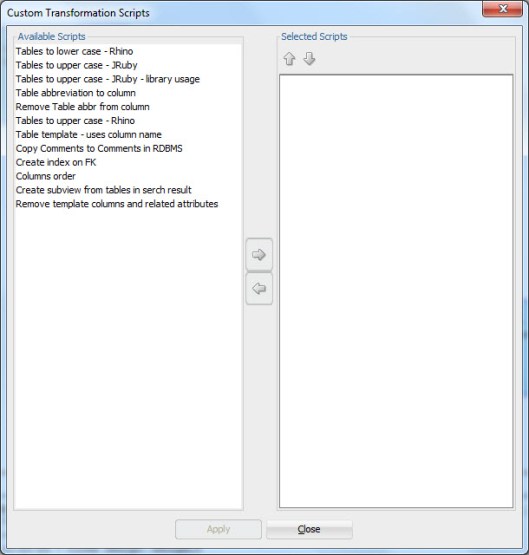
You can, for example, use the prefix when defining Transformation Scripts and limit the functionality to tables with that prefix.

P.S. You can also set Classification Types to several entitites at the same time by right-clicking the Logical Model in Browser and selecting Set Classification Types.


DDL Generation

12 Tuesday Jul 2016

Posted by Helifromfinland in Data Modeler

≈ 2 Comments

After you have designed your database you need to get the DDLs to be able to create the database objects. When generating the DDL scripts with Data Modeler you have two choices: generate just a single file or several files. Depending on your processes and your current need one of these could be much better option than the other.

To generate the DDLs select Export, DDL File from the File Menu:

Export1


Then select the RDBMS you want to generate the DDL for (Oracle, SQL Server or DB2 and the right version of it, in Data Modeler that is called a Database Site) and the relational model wanted. Press Generate.

Export2

Now select the objects you want to generate the DDLs for.

Export3

And with the selection in Generate DDL in Separate Files you define whether the DDL will be a single file (not selected) or generated in separate files (selected).

If you select Generate DDL in Separate Files and press OK, you are asked for the directory where the DDL files will be saved:

Export4

Select that and in that directory you will have several new subdirectories:

Export45

Each of these subdirectories will include files for creating an object of that type. For instance the Table subdirectory might look something like this:

Export5

Whether you chose Generate DDL in Separate Files or not, you will have one single DDL file shown in the tool:

Export6

and you can save that as a single file by pressing Save.

In short: if you do not select Generate DDL in Separate Files you will have the DDL in one file and you can either save it or not. If you select Generate DDL in Separate Files you will automatically have the several DDL files saved in the directory you have specified and you can save the single DDL file if you want.

Note: if the physical model is not open the DDLs will be very general without any physical properties. If the physical model is closed the DDL might look like this:

CREATE TABLE Customer
(
CustNO NUMBER (10) NOT NULL ,
Name   VARCHAR2 (100) NOT NULL
) ;
ALTER TABLE Customer ADD CONSTRAINT Customer_PK PRIMARY KEY ( CustNO ) ;

And if it is open it might look something like this:

CREATE TABLE Customer
(
CustNO NUMBER (10) NOT NULL ,
Name   VARCHAR2 (100) NOT NULL
)
PCTFREE 10 PCTUSED 40 TABLESPACE TableSpace1 LOGGING STORAGE
  (
    PCTINCREASE 0 MINEXTENTS 1 MAXEXTENTS UNLIMITED FREELISTS 1 FREELIST GROUPS 1 BUFFER_POOL DEFAULT
  ) ;
ALTER TABLE Customer ADD CONSTRAINT Customer_PK PRIMARY KEY ( CustNO ) ;


Data Modeler and JavaScript

12 Tuesday Jul 2016

Posted by Helifromfinland in Data Modeler

≈ 4 Comments

A good skill to have with Data Modeler is JavaScript: using that you can change the way the tool works and you can automate many things. Where can I use those skills? There are two places in Data Modeler: Transformations and Table DDL Transformations.

Transformations

Transformations

Transformations can be used to change the design. For instance while Engineering to Relational you could add columns to a table. Usually those columns are of a type of technical columns (for example creator, created, modifier, modified), or columns that should always exist for a type of table based on the methodology used (for example Data Vault defines certain columns to exist for certain kinds of tables: hubs, links and satellites). Or you can use them anywhere in your design to automate changes. To execute a script right-click on the Browser and select Apply Custom Transformation Scripts:

ApplyTransScripts1

Select the script/scripts from the list and press Apply:

ApplyTransScripts2

In short: Transformations are used to change the design programmatically.


Table DDL Transformations

TableDDLTransformations

Table DDL Transformations can be used to change the DDL Data Modeler generates. The design itself is not changed, only the DDL script. This can be used for example to generate the journaling mechanism (journaling tables and triggers) or DDL scripts for a RDBMS that is not supported by Data Modeler, for instance MySQL.

To use a script defined select it from the list in DDL Generation:

TableDDL1

Define the tables that DDL generation you want to be affected by the script:

TableDDL2

And Generate the DDL by pressing OK.

In short: Table DDL Transformations are used to change the DDL generated.


#KScope16

11 Monday Jul 2016

Posted by Helifromfinland in Events

≈ Leave a comment

One of my fav events and a must to attend is definitely KScope. This year it was held June 26-30 in Chicago which was a perfect location for me: never been there and have a direct flight from Helsinki 🙂

Chicago2

The reason I write this post so late is that at the end of the event I managed to catch a flu and have been a bit slow and quiet. Now I am fine again 🙂

KScope always starts with a Community Service Day on Saturday but unfortunately I always miss it. The reason is that on Friday we have the biggest celebration (mid-Summer) of a year in Finland and I simply cannot miss that! Sunday is a day for Symposiums and that is something I always attend. Also this year. I am glad that it has been made possible for attendees to attend any of those tracks and I usually jump from one symposium to another during the day and learn about many different areas.

This year I had two session: Managing the Changes in Database Structures Using Oracle SQL Developer Data Modeler and a Thursday Deep Dive: Database Design for Developers.

Chicago_Heli

(Thank you Bryn Llewellyn for the photo!)

I also moderated the database panel and a WIT roundtable. Thank you for attending my sessions and especially thank you to my wonderful panel: Kim Berg Hansen, Robert Lockard, Cary Millsap and Björn Rost. You were amazing! And a special thank you to Cary for this:

Chicago_Cary

You really made my day!

One of the hightlights of KScope is the Wednesday party. This time it was held in the Museum of Science and Industry. What a party!

Chicago3

Thank you ODTUG! It was an amazing event! Bye-bye Chicago

Chicago

See you all next year in San Antonio! (http://www.kscope17.com/)


Sensitive Data

06 Wednesday Jul 2016

Posted by Helifromfinland in Data Modeler

≈ Leave a comment

You can also design your sensitive data using Data Modeler.

In table properties you can define a redaction policy for the table:

REdactionPOlicy

In column properties (double-click the column name in table properties or press the XYZ icon) select Security.

Security

In this tab you can design two main categories: Redaction and TSDP (Transparent Sensitive Data Protection).

In Redaction section you can define whether or not the column holds personally identifiable information (PII) (YES/NO), whether or not it holds sensitive information (YES/NO), the masking type used (FULL, NO, PARTIAL, RANDOM, REGEXP) and which masking template to use.

You can define your own masking templates by selecting Mask Templates Administration from Tools Menu:

MaskTemplates


After defining them they will be available in the list. Note that they must be of the same datatype as the column itself and of the same masking type selected to be seen on the list.


In TSDP section you can define the Sensitive Type used and type in the Sensitive Data Description.

You can define new sensitive types by right-clicking the Sensitive Types in Browser and selecting New Sensitive Type.

SensitiveTypes


And now back to the Column Properties and the Security Properties. In TSDP Section we can select a Sensitive Type created as a sensitive type for that column, as well as Masking Type and Mask Template:

SSNDef


You can also define sensitive type for a Domain:

SenTypeName


You can define new TSDP policies by right-clicking the TSDP Policies in the Browser and selecting New TSDP Policy:

TSDPPolicy

They can include Sub Policies:

SubPolicy

with Mask Types and Mask Templates etc.

You can also attach a Sensitive Type to the TSDP Policy:

TSDPSenType


After designing the sensitive data you might want to see a report of it.

The best way to do that is Search and Advanced Mode:

SSNReport

Select Contains sensitive information Property and true.

ReportResult

Now you can see all the columns that have been defined to hold sensitive data.

Press Report and select the format type preferred etc.

And here we are…

Report


Newer posts →

Subscribe

  • Entries (RSS)
  • Comments (RSS)

Archives

  • December 2025
  • October 2023
  • October 2022
  • October 2021
  • April 2020
  • October 2019
  • October 2018
  • June 2018
  • December 2017
  • October 2017
  • September 2017
  • July 2017
  • April 2017
  • March 2017
  • February 2017
  • January 2017
  • December 2016
  • November 2016
  • October 2016
  • September 2016
  • August 2016
  • July 2016
  • June 2016
  • May 2016
  • April 2016
  • March 2016
  • February 2016
  • December 2015
  • November 2015
  • October 2015
  • September 2015
  • August 2015
  • July 2015
  • June 2015
  • May 2015
  • April 2015
  • March 2015
  • January 2015
  • December 2014
  • November 2014
  • October 2014
  • September 2014
  • August 2014
  • June 2014
  • May 2014
  • April 2014
  • January 2014
  • December 2013
  • November 2013

Categories

  • Data Modeler
  • Database design
  • Events
  • General
  • Machine learning and AI
    • AI Agents
  • Oracle
  • SQL Developer

Meta

  • Create account
  • Log in

Blog at WordPress.com.

Privacy & Cookies: This site uses cookies. By continuing to use this website, you agree to their use.
To find out more, including how to control cookies, see here: Cookie Policy
  • Subscribe Subscribed
    • HeliFromFinland
    • Join 53 other subscribers
    • Already have a WordPress.com account? Log in now.
    • HeliFromFinland
    • Subscribe Subscribed
    • Sign up
    • Log in
    • Report this content
    • View site in Reader
    • Manage subscriptions
    • Collapse this bar
 

Loading Comments...